personal research
> .hip file available here

Breakdown
During pandemic isolation I’ve had time to do some research and experimentation into rendering black holes, implemented in Houdini and Mantra.
One of the best references for this is dneg’s paper ‘Gravitational Lensing by Spinning Black Holes in Astrophysics, and in the Movie Interstellar’. Their approach is much more complex, with a lot of clever techniques that are way over my head to make it scientifically accurate and performant, but there’s still a lot of practical information to be gleaned. I’m not a mathematician or physicist, and what I’ve done here is all a big hack in the service of making passable looking visual effects. Please let me know if I’ve got something horribly wrong!
One of the best references for this is dneg’s paper ‘Gravitational Lensing by Spinning Black Holes in Astrophysics, and in the Movie Interstellar’. Their approach is much more complex, with a lot of clever techniques that are way over my head to make it scientifically accurate and performant, but there’s still a lot of practical information to be gleaned. I’m not a mathematician or physicist, and what I’ve done here is all a big hack in the service of making passable looking visual effects. Please let me know if I’ve got something horribly wrong!
This project was made much easier by the flexibility and tight integration of Mantra in Houdini. While Mantra may not be as tightly optimised as other renderers, the level of flexibility it offers, especially with Houdini’s VEX libraries, is hard to match.
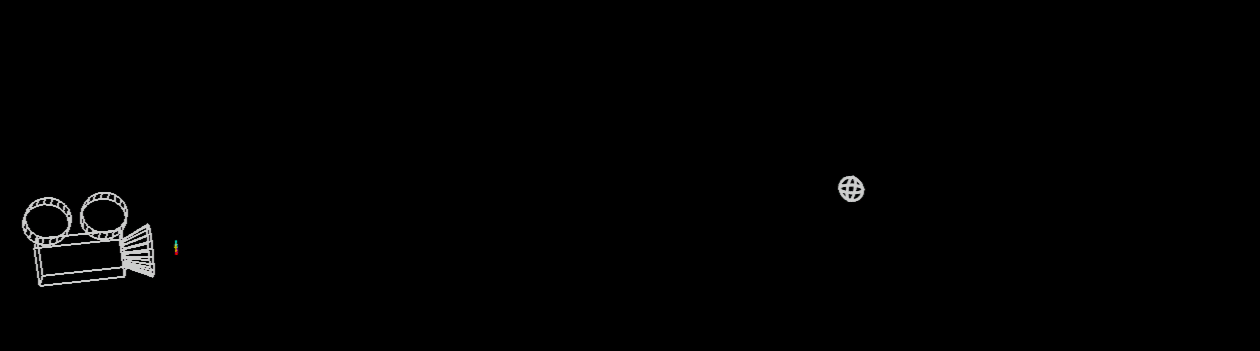
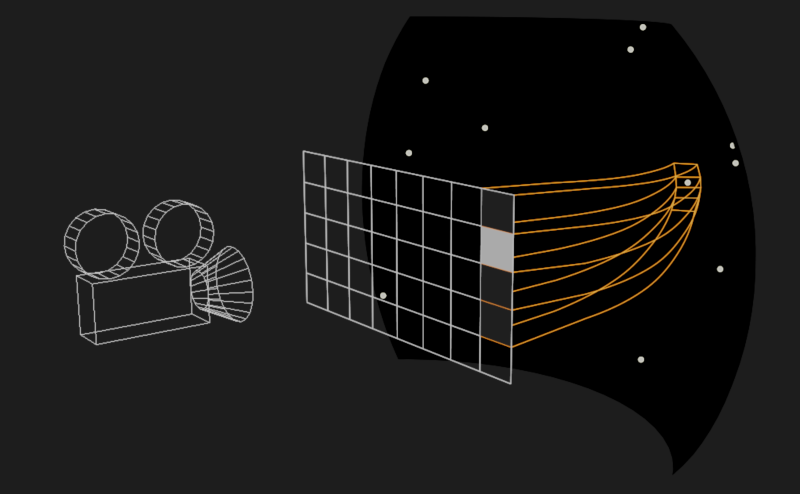
Most of the techniques used in the render process were first prototyped in 3d geometry form. The VEX code for calculating ray paths is in the form of a Houdini Digital Asset that can be re-used in both SOPs and at render time, and is how the visualisations below were made.
Most of the techniques used in the render process were first prototyped in 3d geometry form. The VEX code for calculating ray paths is in the form of a Houdini Digital Asset that can be re-used in both SOPs and at render time, and is how the visualisations below were made.
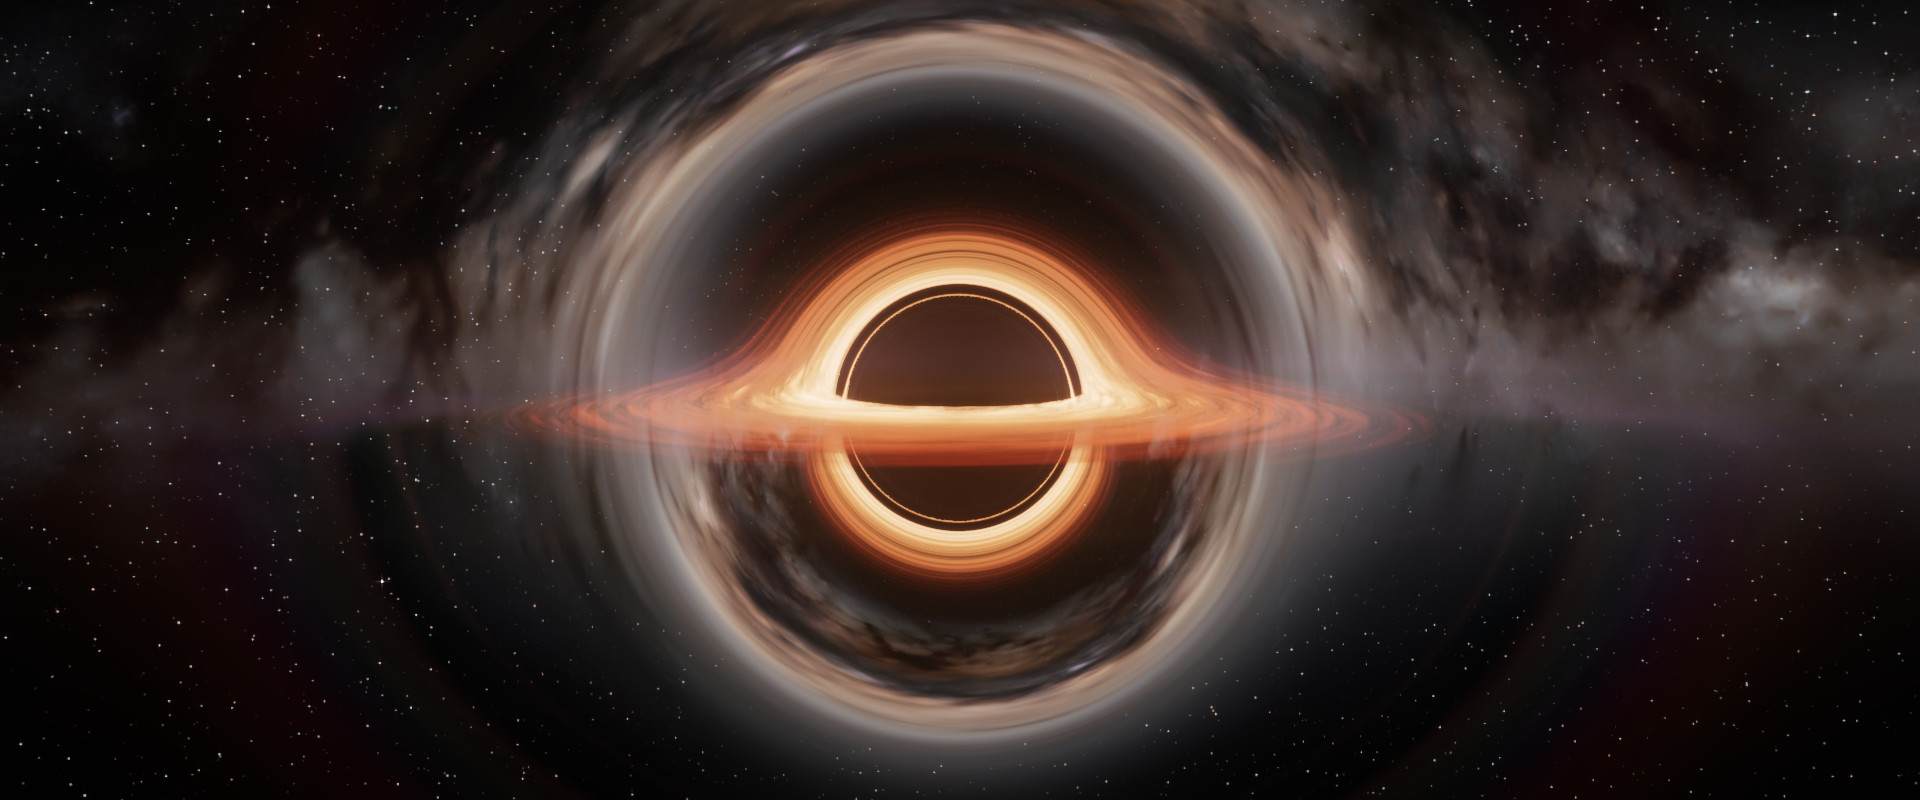
Rendering with curved rays
This all came about after experimenting with ‘taking over’ a Mantra render, by rendering a dummy surface in front of the camera with a custom shader, and using a VEX snippet to re-spawn shifted rays into the scene. A curved ray path can be approximated by taking many small steps through the scene (like ray marching) and modifying the ray direction at each step.
To mimic gravitational lensing, I’m just integrating the curved ray paths from the camera out into the scene, as if each ray sample was a particle going through a physics simulation. The gravity of the black hole acts as a force, bending the ray paths towards it.
To mimic gravitational lensing, I’m just integrating the curved ray paths from the camera out into the scene, as if each ray sample was a particle going through a physics simulation. The gravity of the black hole acts as a force, bending the ray paths towards it.
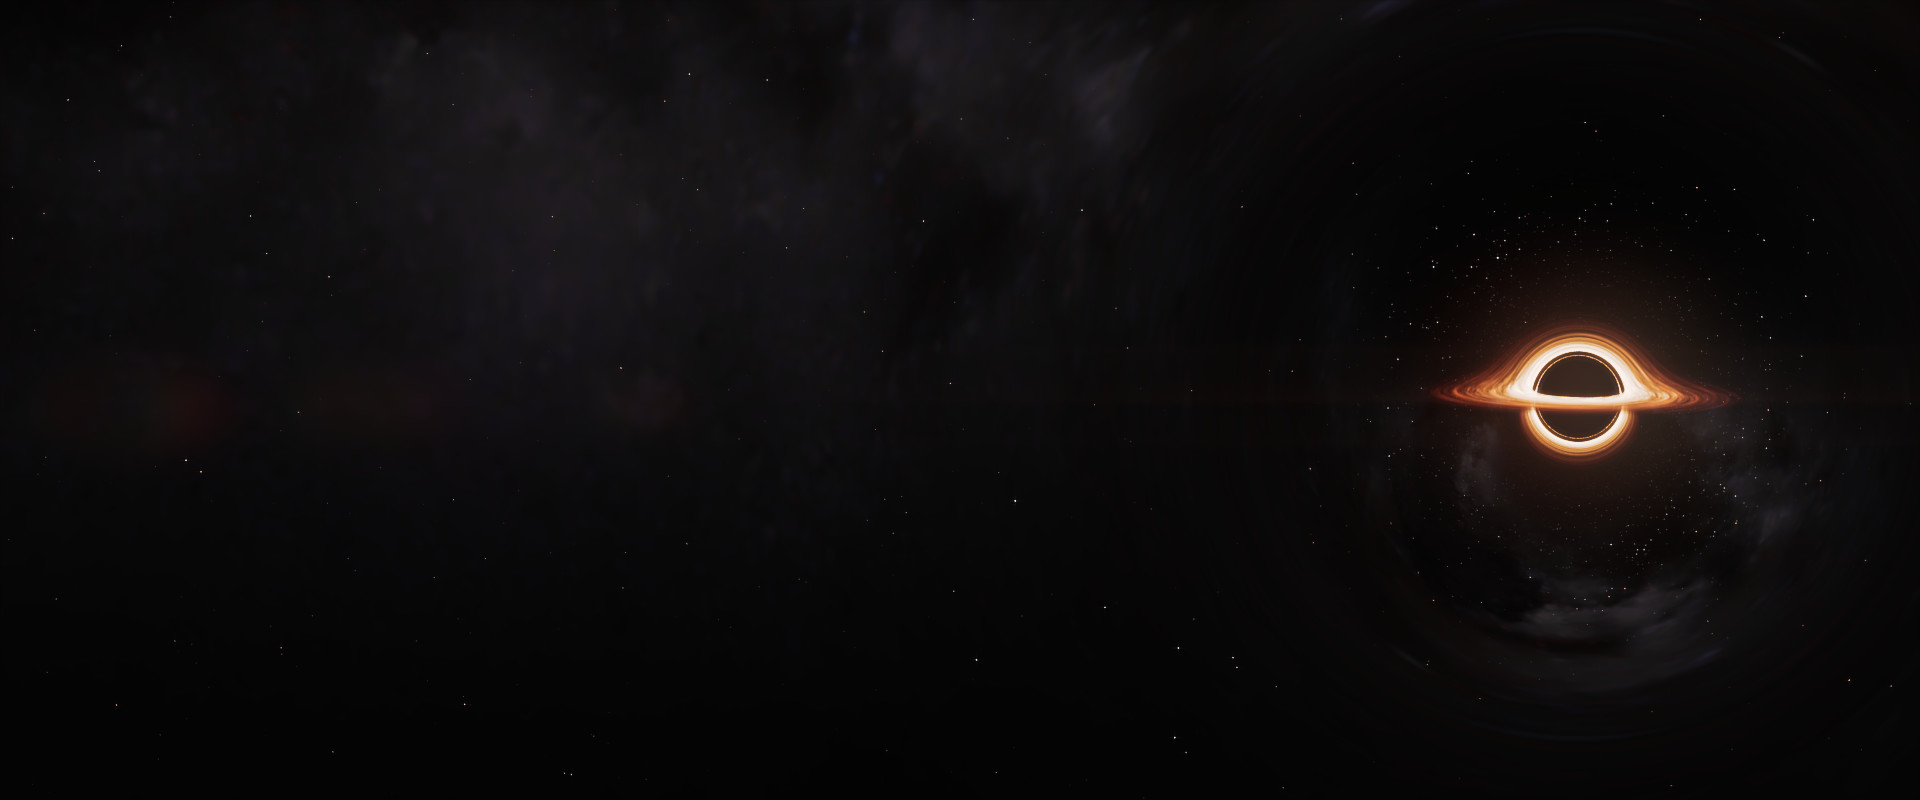
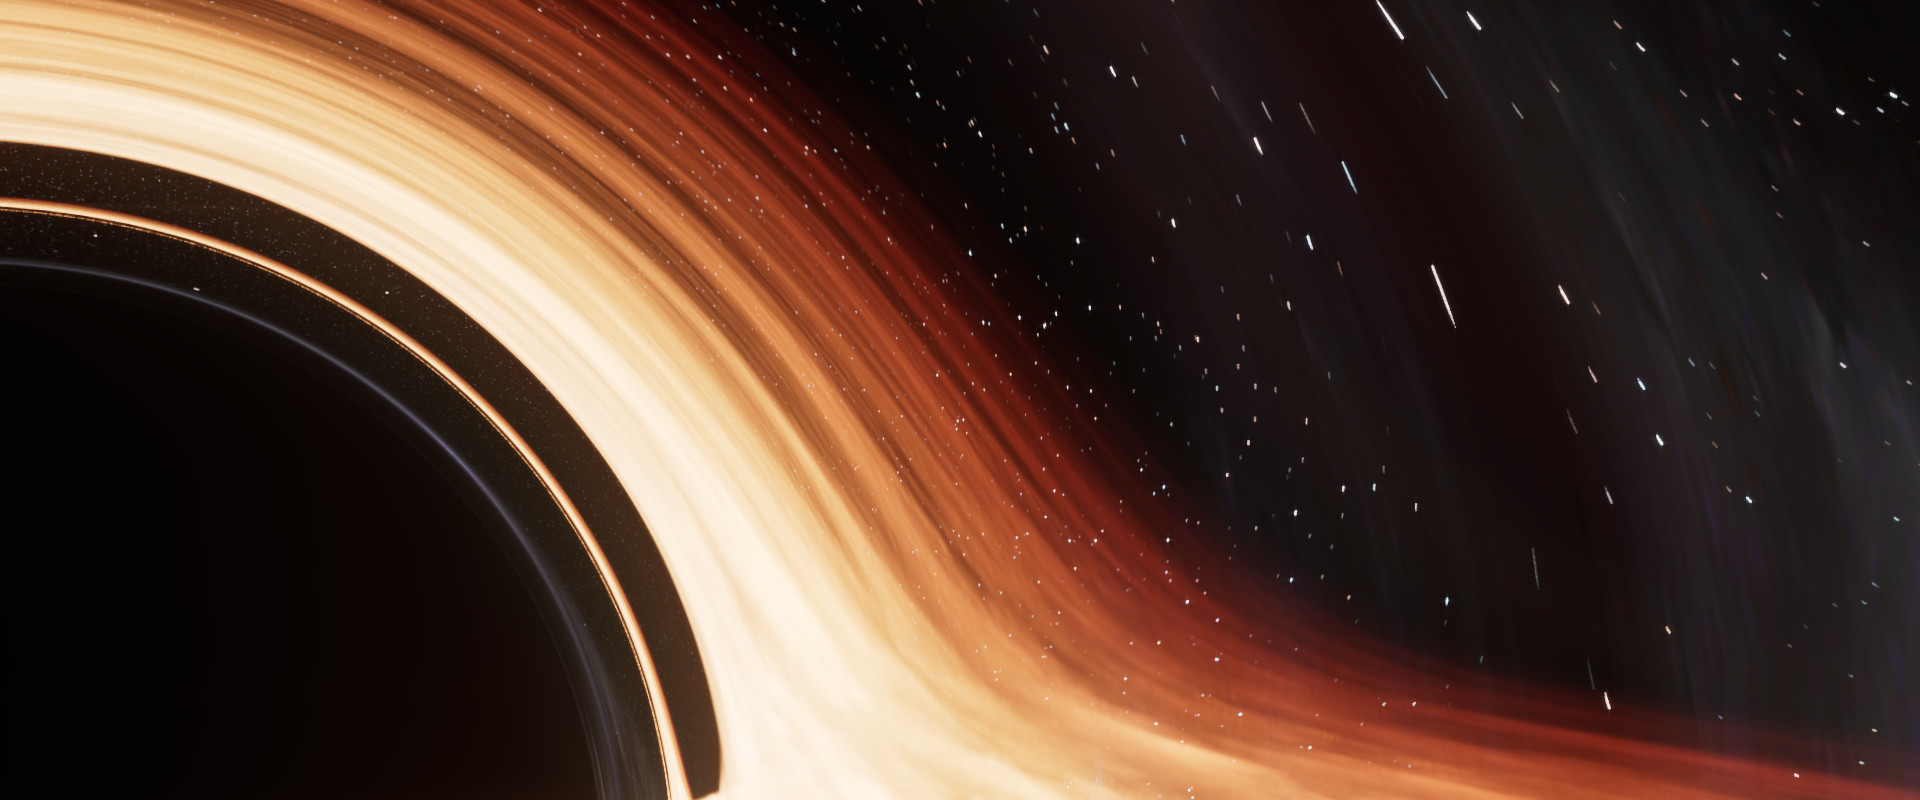
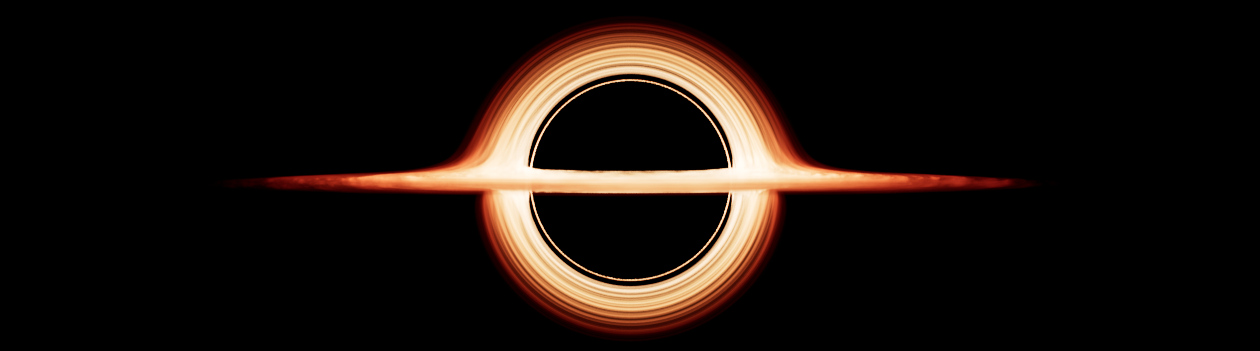
At each ray segment, it calls Mantra’s VEX trace() function to shade and return luminance for any objects encountered along that ray segment, in this case an accretion disk. The disk is a thin, circular volume, orbiting the singularity. In the final image, the forward-facing ring around the black hole is apparent due to camera rays bending around the top and bottom of the singularity and intersecting the flat accretion disk behind.

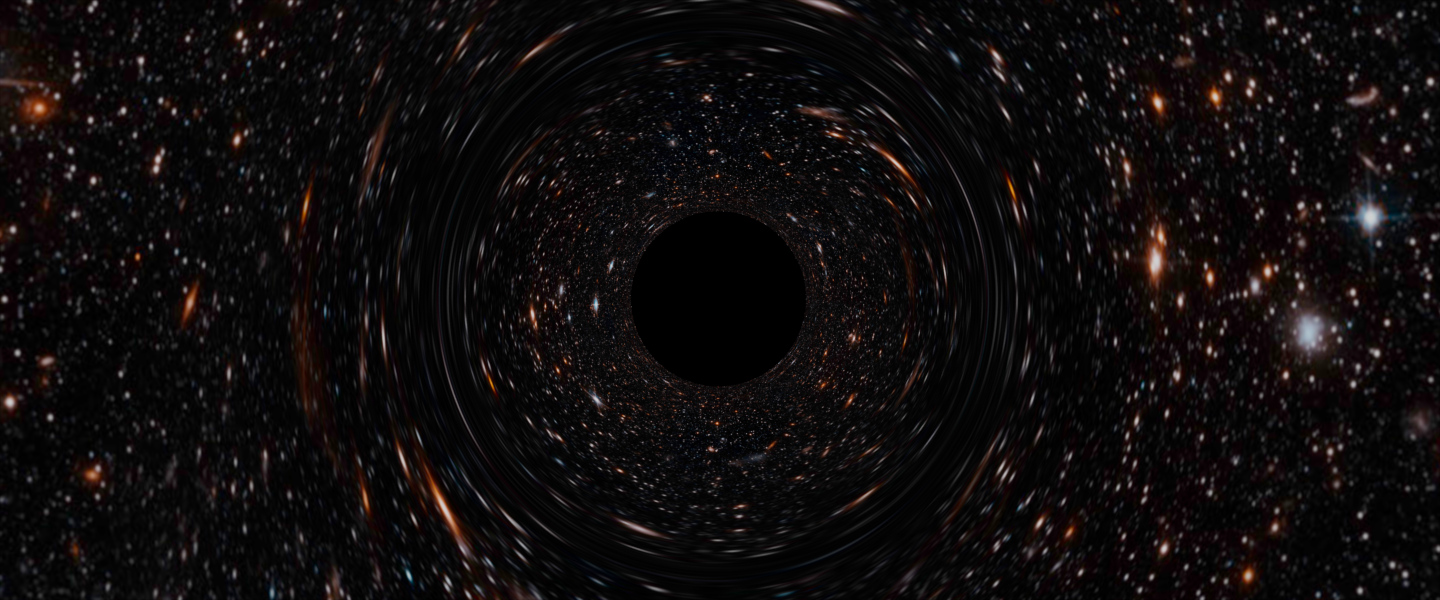
Stars
Correctly rendering stars turned out to be much more complicated than rendering the black hole and accretion disk itself. A simple approach would be to do it as you’d render any other CG sky, by using the final ray directions to look up an environment map. This would probably be fine in a normal sky render, but under gravitational lensing it reveals unrealistic artifacts.
The problem is related to the concept of ‘solid angle’, which is the angle that something covers in a field of view, relative to the sphere of all possible directions around the viewpoint. For example, if you have an image taken with a 50° field of view that’s 100 pixels wide, then each pixel covers roughly 0.5° degrees in one dimension.
In reality, stars are extremely far away, so the solid angle that a star takes up in our field of view is absolutely tiny - much, much smaller than a pixel. Stars are still visible, because when you take a photograph of the night sky, even though the star itself doesn’t cover the area of a pixel, the thin beam of light that’s emitted is strong enough that the photosite in a camera’s sensor will still collect it and light up. Sometimes in a photograph of the sky, stars will appear larger than a pixel, but that’s due to other factors such as diffusion of light within a lens or sensor.
In reality, stars are extremely far away, so the solid angle that a star takes up in our field of view is absolutely tiny - much, much smaller than a pixel. Stars are still visible, because when you take a photograph of the night sky, even though the star itself doesn’t cover the area of a pixel, the thin beam of light that’s emitted is strong enough that the photosite in a camera’s sensor will still collect it and light up. Sometimes in a photograph of the sky, stars will appear larger than a pixel, but that’s due to other factors such as diffusion of light within a lens or sensor.
The result of this is that when you render the sky using a starry environment map, the pixels in the map are much larger than the actual solid angles of the real stars in the sky.
In a usual render of a sky, when there’s a close to 1:1 relationship between the sky map pixels and the final render frame pixels, you can get away with it, but when bending the light rays due to gravitational lensing, multiple camera rays can converge on the same pixels in the sky map, causing the star to smear across the rendered image.
In a usual render of a sky, when there’s a close to 1:1 relationship between the sky map pixels and the final render frame pixels, you can get away with it, but when bending the light rays due to gravitational lensing, multiple camera rays can converge on the same pixels in the sky map, causing the star to smear across the rendered image.
Rather than collecting pixels from the environment map to determine the final rendered pixel’s colour, we can do a better job if we treat things more physically. Instead we want a pixel to only receive luminance if a star, treated as an infinitesimally small point source, is within. To figure this out, we need to know how the rays from that pixel warp through the scene and finally end up projected on the celestial sphere.
Most renderers have a way of measuring the dimensions of a pixel, known as the derivatives or differentials.
Most renderers have a way of measuring the dimensions of a pixel, known as the derivatives or differentials.
In Mantra these are the vector variables dPds and dPdt - they’re vectors representing the change in position with respect to the s and t coordinates of the frame, you can think of them as tracing out a pixel’s edges in space.
If we trace two additional rays through the gravitational lensing setup, offset by the dPds and dPdt vectors then we’ll know the shape that the pixel represents when it ends up projected against the celestial sphere, and we can then determine if a star is inside.
If we trace two additional rays through the gravitational lensing setup, offset by the dPds and dPdt vectors then we’ll know the shape that the pixel represents when it ends up projected against the celestial sphere, and we can then determine if a star is inside.

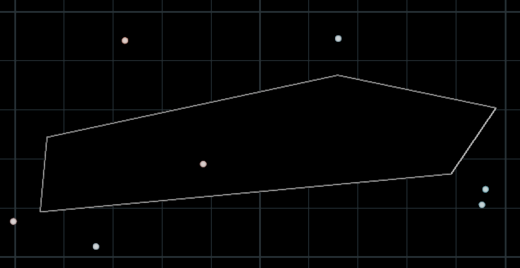
When we’re rendering stars, it’s assumed that the rays have done all the warping they’re going to do, and are now just extending off into infinity. At infinite length, we don’t care about the rays’ positions, just their directions, so things become much simpler if we convert to polar coordinates and work in two dimensions rather than three.
The stars are stored as a point cloud inside Houdini, unwrapped into their 2D polar coordinates. In this coordinate space, the projected pixel and its derivatives become a parallelogram, and we can use a point-in-polygon test to determine whether there’s a star inside.
Using pcfind(), limited to the bounding radius of the pixel footprint, we can accelerate the point-in-polygon test by narrowing down the number of stars to query in advance.
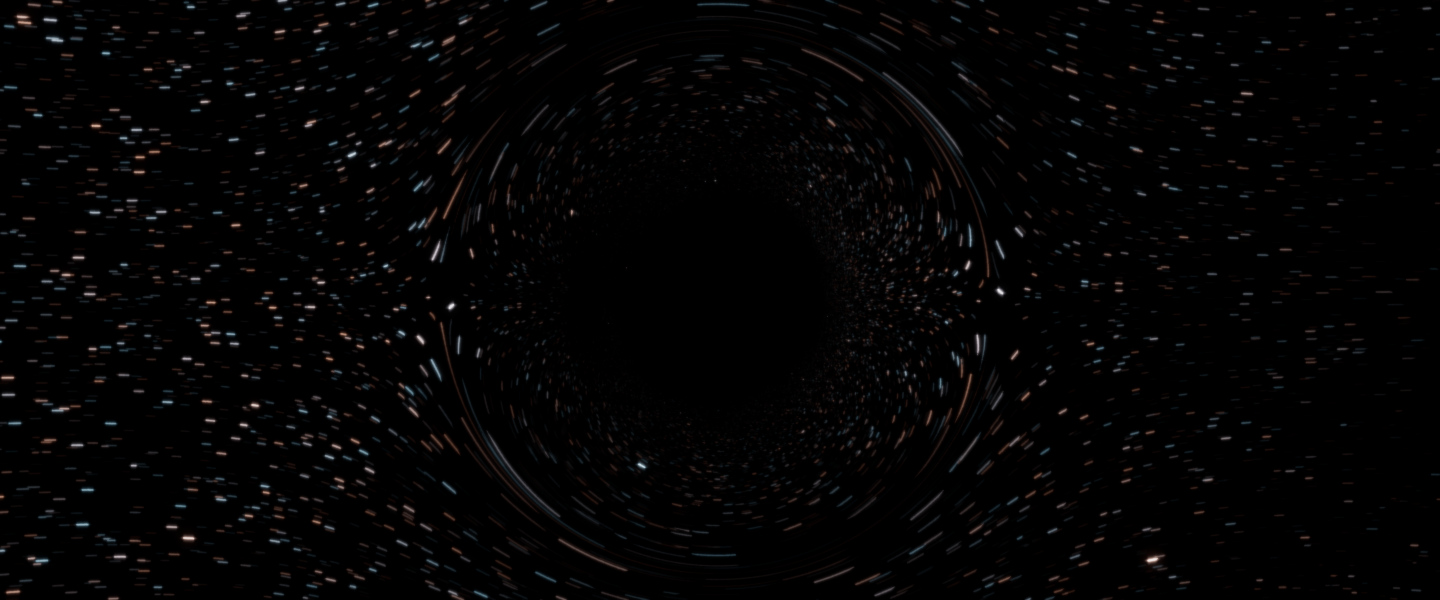
Motion blur
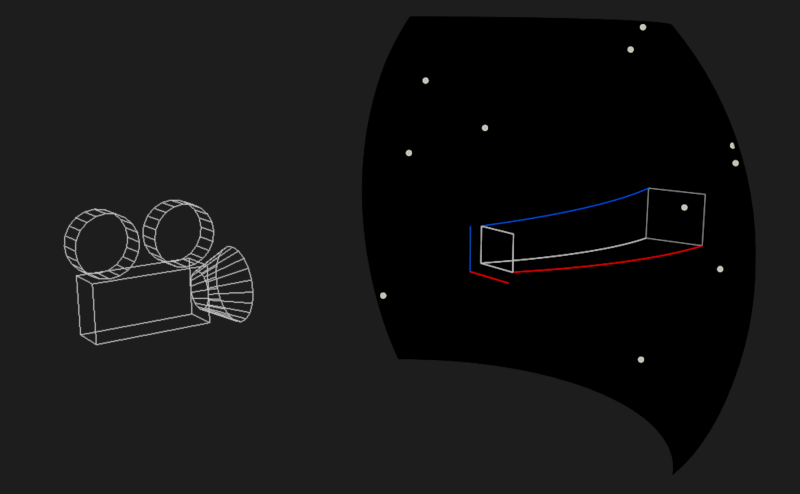
In order to correctly render motion blurred stars, it’s possible to expand this technique. The usual way of thinking about motion blur is ‘Does this object’s path cross this pixel, during the duration of the shutter?’ but we can flip this around and test if the current pixel’s path, projected on the celestial sphere, crosses a star.
With star rendering already working, this is relatively simple. Rather than testing a single pixel (and its derivatives’) projection on the sphere, we want to trace a ‘swept pixel’ - the shape that the pixel covers as it moves across the starfield. We can do this by tracing two sets of rays, representing the state of the pixel at the shutter open time and shutter close time.

In polar coordinates we can calculate a convex hull of those two parallelograms, approximating the pixel’s motion across the shutter, and re-use the point-in-polygon test to determine if a star falls inside.
For a small increase in render time (much less than sending more primary rays), this generates perfectly smooth and accurate motion blurred stars. The streaks visible below are the paths of the stars as they are warped in screen space by the gravitational lensing over time, not distortion artifacts.